Search
Latest Articles
How make your own custom bait molds
by Rick Lawrence, May 09, 2020
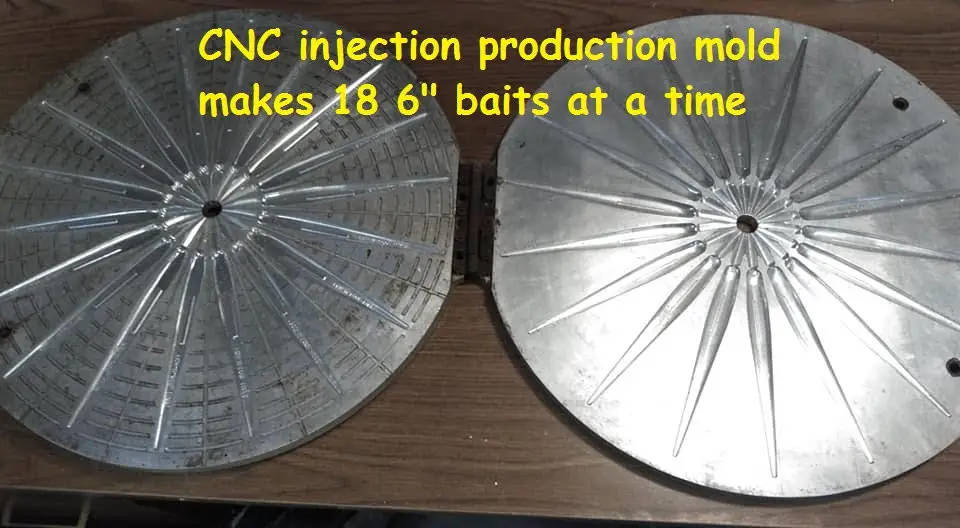
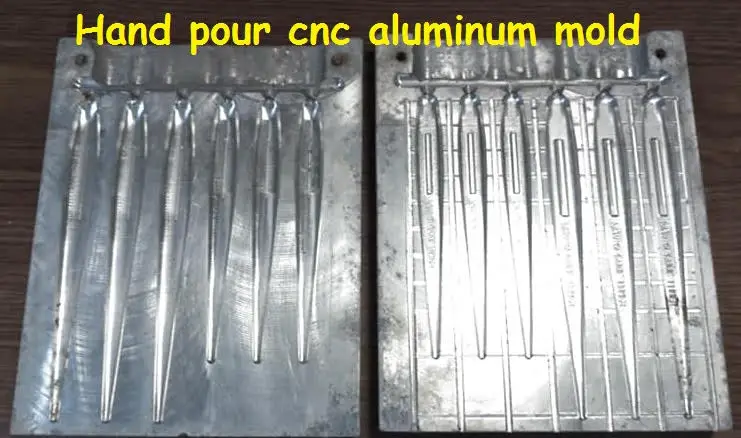
In these trying times we all need a way to occupy our time. So why not take a crack at making your own baits. I will show you how to make your own molds so you can either copy a bait you like that you can’t get anymore or to make something of your own design. First there are 4 commonly used materials to make molds for soft plastic baits from. The best and most expensive is a custom CNC machined aluminum mold. These can run from a few hundred to ten grand for a custom bait mold. Next are silicone molds. These you can make yourself at a reasonable cost and get a fairly good mold. Smooth-on and Alumilite both carry a variety of silicone molding products. The cheapest molding material is Plaster Of Paris. However POP molds are of somewhat poor quality and break easy. The next step up is Durham’s water putty. It is inexpensive, holds good detail, and is easy to work with.
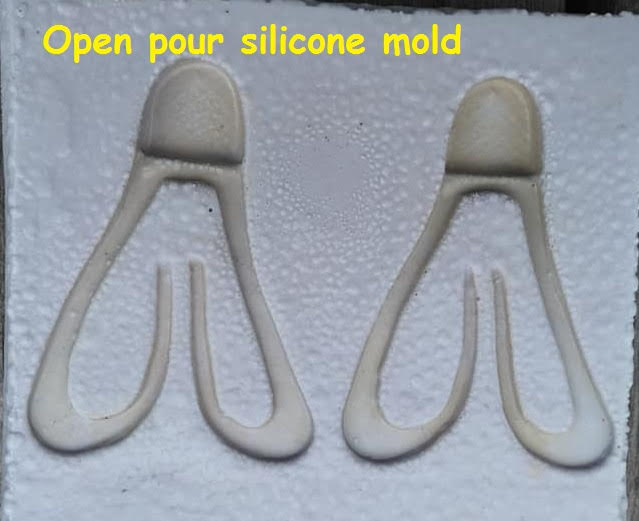
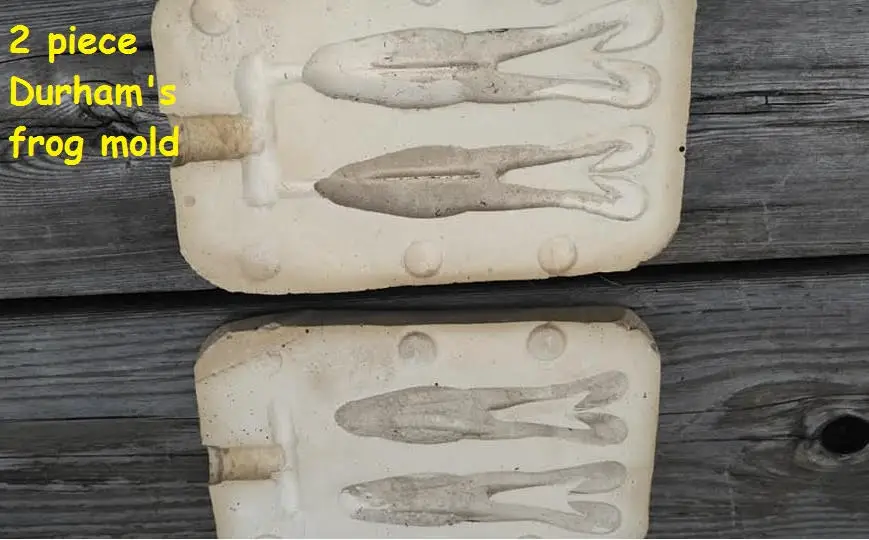
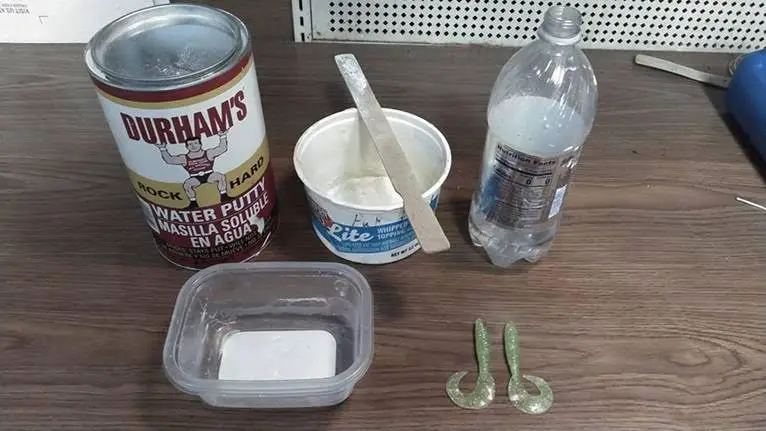
In order to start making baits all you need is a can of the Durham’s putty, a bait or prototype to mold, some kind of mold box, a stir stick or old butter knife to mix your Durham’s with and a plastic bowl to mix in. There are 2 types of molds that are common in bait making, an open pour 1 piece mold and a 2 piece mold for making fully round baits that don’t have a flat side. I use both types of molds depending on what bait I want to make looks like.
If you plan to make a bait of your own design you can use Sculpey clay to make you pattern.
You can also make a bait from wood, but a hard bait in a hard mold is very difficult to remove without damaging it. In general if you make a hard mold use a soft master, if you want to use a hard master use silicone for your mold.
I will show you how I make a curly tail grub mold for this demonstration. First find a mold box that fits the bait you want to mold, you can use an old Tupperware container or throwaway plastic square bowl.
You can even make your own with cardboard or stacked Lego’s glued to a flat surface. To make a 1 piece open pour mold glue your bait or prototype in the bottom of the mold. Your bait must have a flat side for this to work. If you want a fully round bait you need to make a 2 piece mold and I prefer a rectangular plastic dish for this as it helps to take the mold in and out of the container as you are molding it.
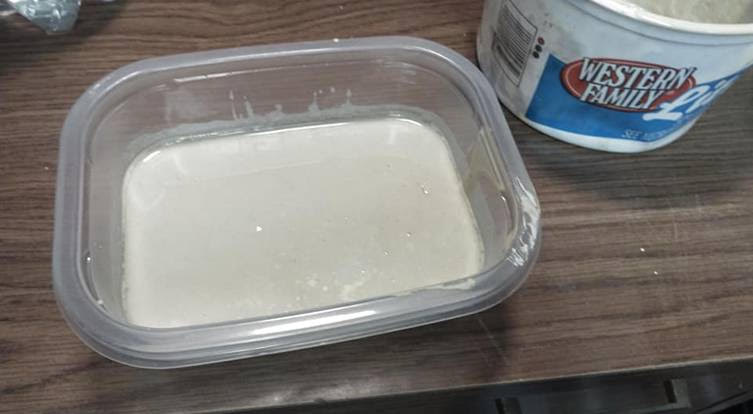
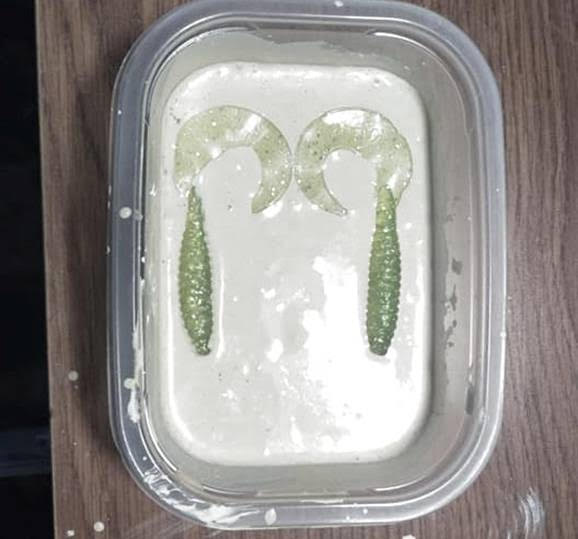
Now that you have you mold box ready spray it lightly with some kind of mold release. You can use Pam cooking spray for this or a real mold release agent in a spray can. Mix up however much of the Durham’s you think you will need to fill your mold about a 1 1/4” thick on a one piece mold and about 1” for a 2 piece mold for the lower half of the mold. You want the Durham’s to be like thick pancake batter, so you can still pour it but it is not at all like water. With a one piece mold you’re almost done, but with a 2 piece you’re just getting started. Try to keep as many bubbles out of it as you can and a torch run over the top of the mix will pop the bubbles you do get. Let the putty set up a little and carefully set you master down into the putty till it is about half in and half out of the putty. This can be harder than it sounds. If you screw it up just pull the bait out wash it off, dry it, and try again. Once you are happy with how the bait or baits are in the mold box let this cure about 2 to 3 hours.
Next if you used a plastic dish pull the baits out of the mold and pop it out of the dish. If you see any pinholes in the bait cavity you can fix them now by mixing up a tiny amount of putty and work it into any pinholes with a toothpick or whatever you can find that will work. Scrap off any extra with a butter knife to smooth out the bait cavity. You can sand or carve with a sharp knife and get the mold nice and flat, but be careful not to crack the edges of the mold around the bait cavities. Next you need to put in some guild pins (about 4 around the mold) and the easiest way is just drill some ½” to 5/8” holes in the bottom part in the open spaces around the bait cavities. Drill these just deep enough to have about a 1/8” of a flat side of the drill with the V in the bottom. This will lock the 2 half’s of the mold tightly together when you go to pour the baits. If you don’t have room for a large bit use a smaller one.
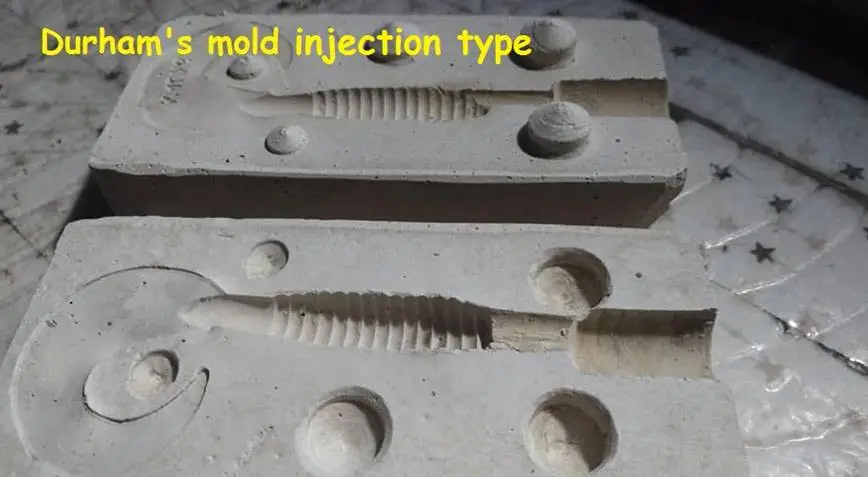
Now that you have the bottom mold prepared your ready to start the top. With a little petroleum jelly stick the baits back into the mold exactly how you took them out. The petroleum jelly will keep the baits in place while you pour the top half of the mold. Spray the mold box, the bottom half of the mold and baits in the mold with a release agent. Now mix up another batch of Durham’s popping the bubbles first then start pouring it in one corner of the mold box and let the Durham’s run over the baits slowly till the baits are covered. Then fill the mold box till the top half of the mold is about 1” thick. Let this cure for 3 hours then you can carefully pry the mold apart. Next carve or drill your sprue holes that you will pour the hot plastic into to make the baits. It works best to have a short small diameter sprue hole just above the bait about a 1/8” to 1/4” depending on the size of your bait and about a 1/8 long. Then a large ½” or 5/8” hole to pour or inject the plastic into. If you are hand pouring the larger you make these the better the mold will pour, as it needs the plastic to stay hot above the bait longer then in the bait itself. If you’re making a multi cavity mold you can use a trough on the top rather than a hole for hand pouring.
After you get the molds completely done, either the one piece open pour mold or the two piece round molds, you need to bake the mold parts in the oven at 220 deg for about 3 hours to cure the mold. This will turn it very, very hard, almost like bone. Smaller molds might need less time in the oven, larger molds might need a little more.
The last step is to coat the bait cavities with an epoxy to make the baits easier to remove and make a nicer looking bait that shines. I use Devcon 2 ton epoxy for this. Mix up small amounts and thin it with rubbing alcohol till it’s almost like water. Use a small brush and paint the inside of the mold cavities and all the sprue holes. This may take a few coats to get a shine in the mold. Be careful not to get a lot of epoxy on the face of the mold or it will not seal tightly and you will get a lot of casting flash.
Once this fully cures your mold is ready to use. I hope you will experiment with new bait ideas and have fun making your own creations.