Breakaway Flashers Make Downrigger Fishing More Fun!
by
Mike Carey, October 10, 2020
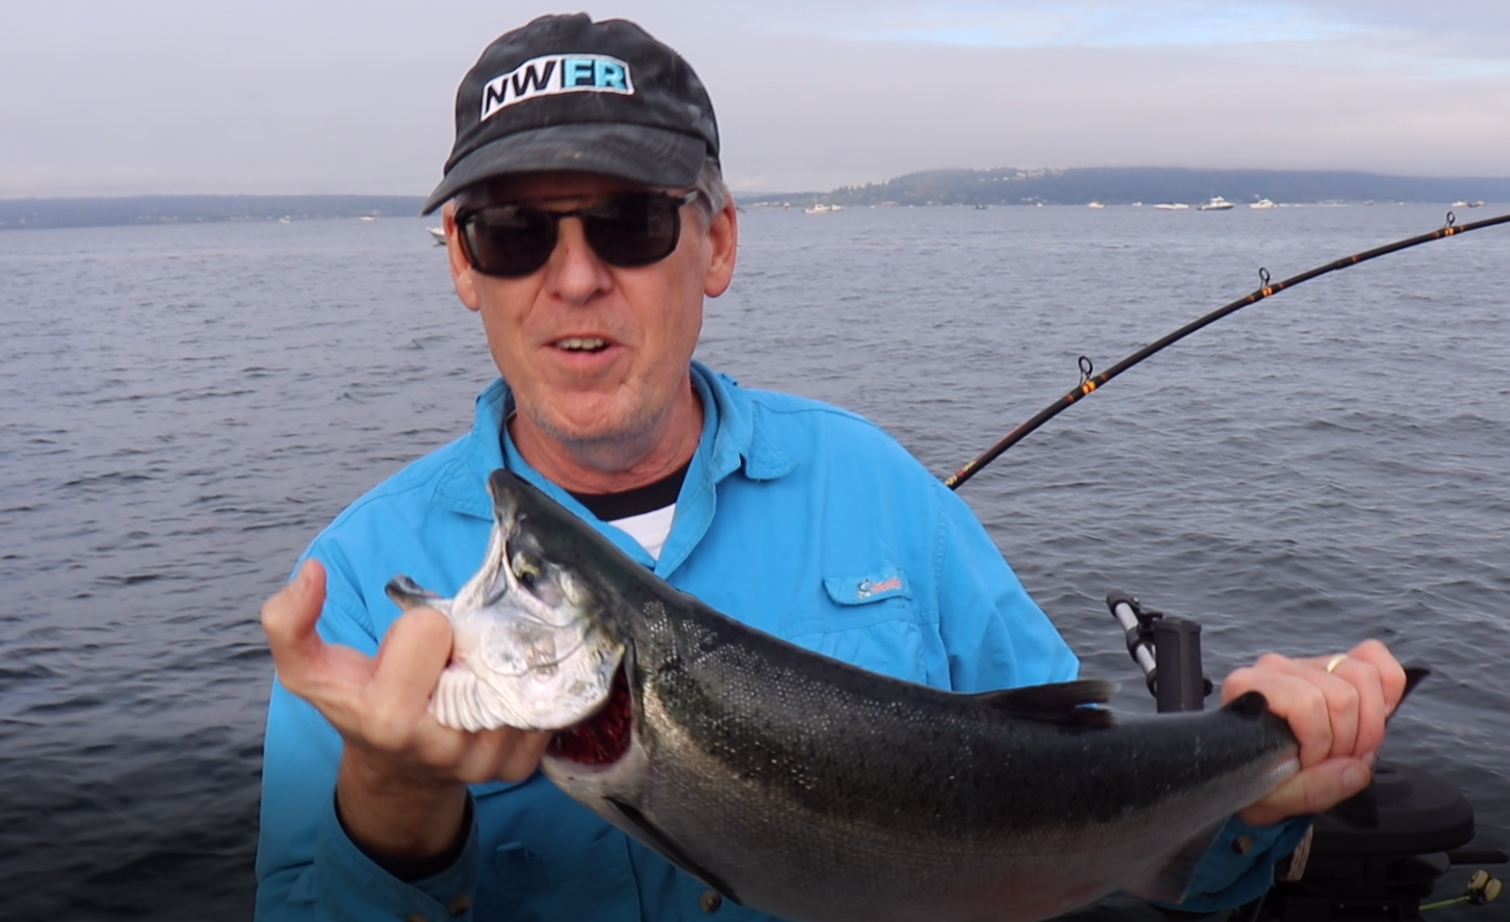
My single action reel spun wildly as the coho took line, rod double over, I enjoyed the pure power the fish displayed. In amazement I watched as the fish clear the water and tail-walked several feet before crashing back down and making another strong run. Working him back to the boat, my friend slid the net under him, a beautiful ten pound September Puget Sound coho. Around us the fleet of recreational anglers was just getting their day underway.
September is one of my most favorite times of the year as the ocean coho make their way through Puget Sound to return to their natal streams. My preferred method of catching these fish is, like many, trolling with downriggers.
Flashers and a hoochie with a herring strip has been far and away the number one set up I’ve used for catching these coho. If you’ve fished this method, then you know that using flashers, while effective, also pose a real problem. First, the drag of the flasher rally reduces the feel of the fish and the fight. Second, when the fish breaks the surface of the water, there is a critical moment when that flasher can catch the water in such a way that the fish can use it to briefly put slack in the line. With barbless hooks that in turn has led over the years to lost fish. Many times I’ve had a guest angler playing a fish only to turn to me as his line goes slack. Another fish lost to simple physics!
Now I’m not going to stop trolling because of this flaw in the gear and I have accepted it as the downside of trolling flashers. So when my friend, Randy Rauscher, showed me a flasher mod he found on the internet, I was interested. And when he caught a coho and I saw how it worked I was excited and immediately went home to convert all my flashers.
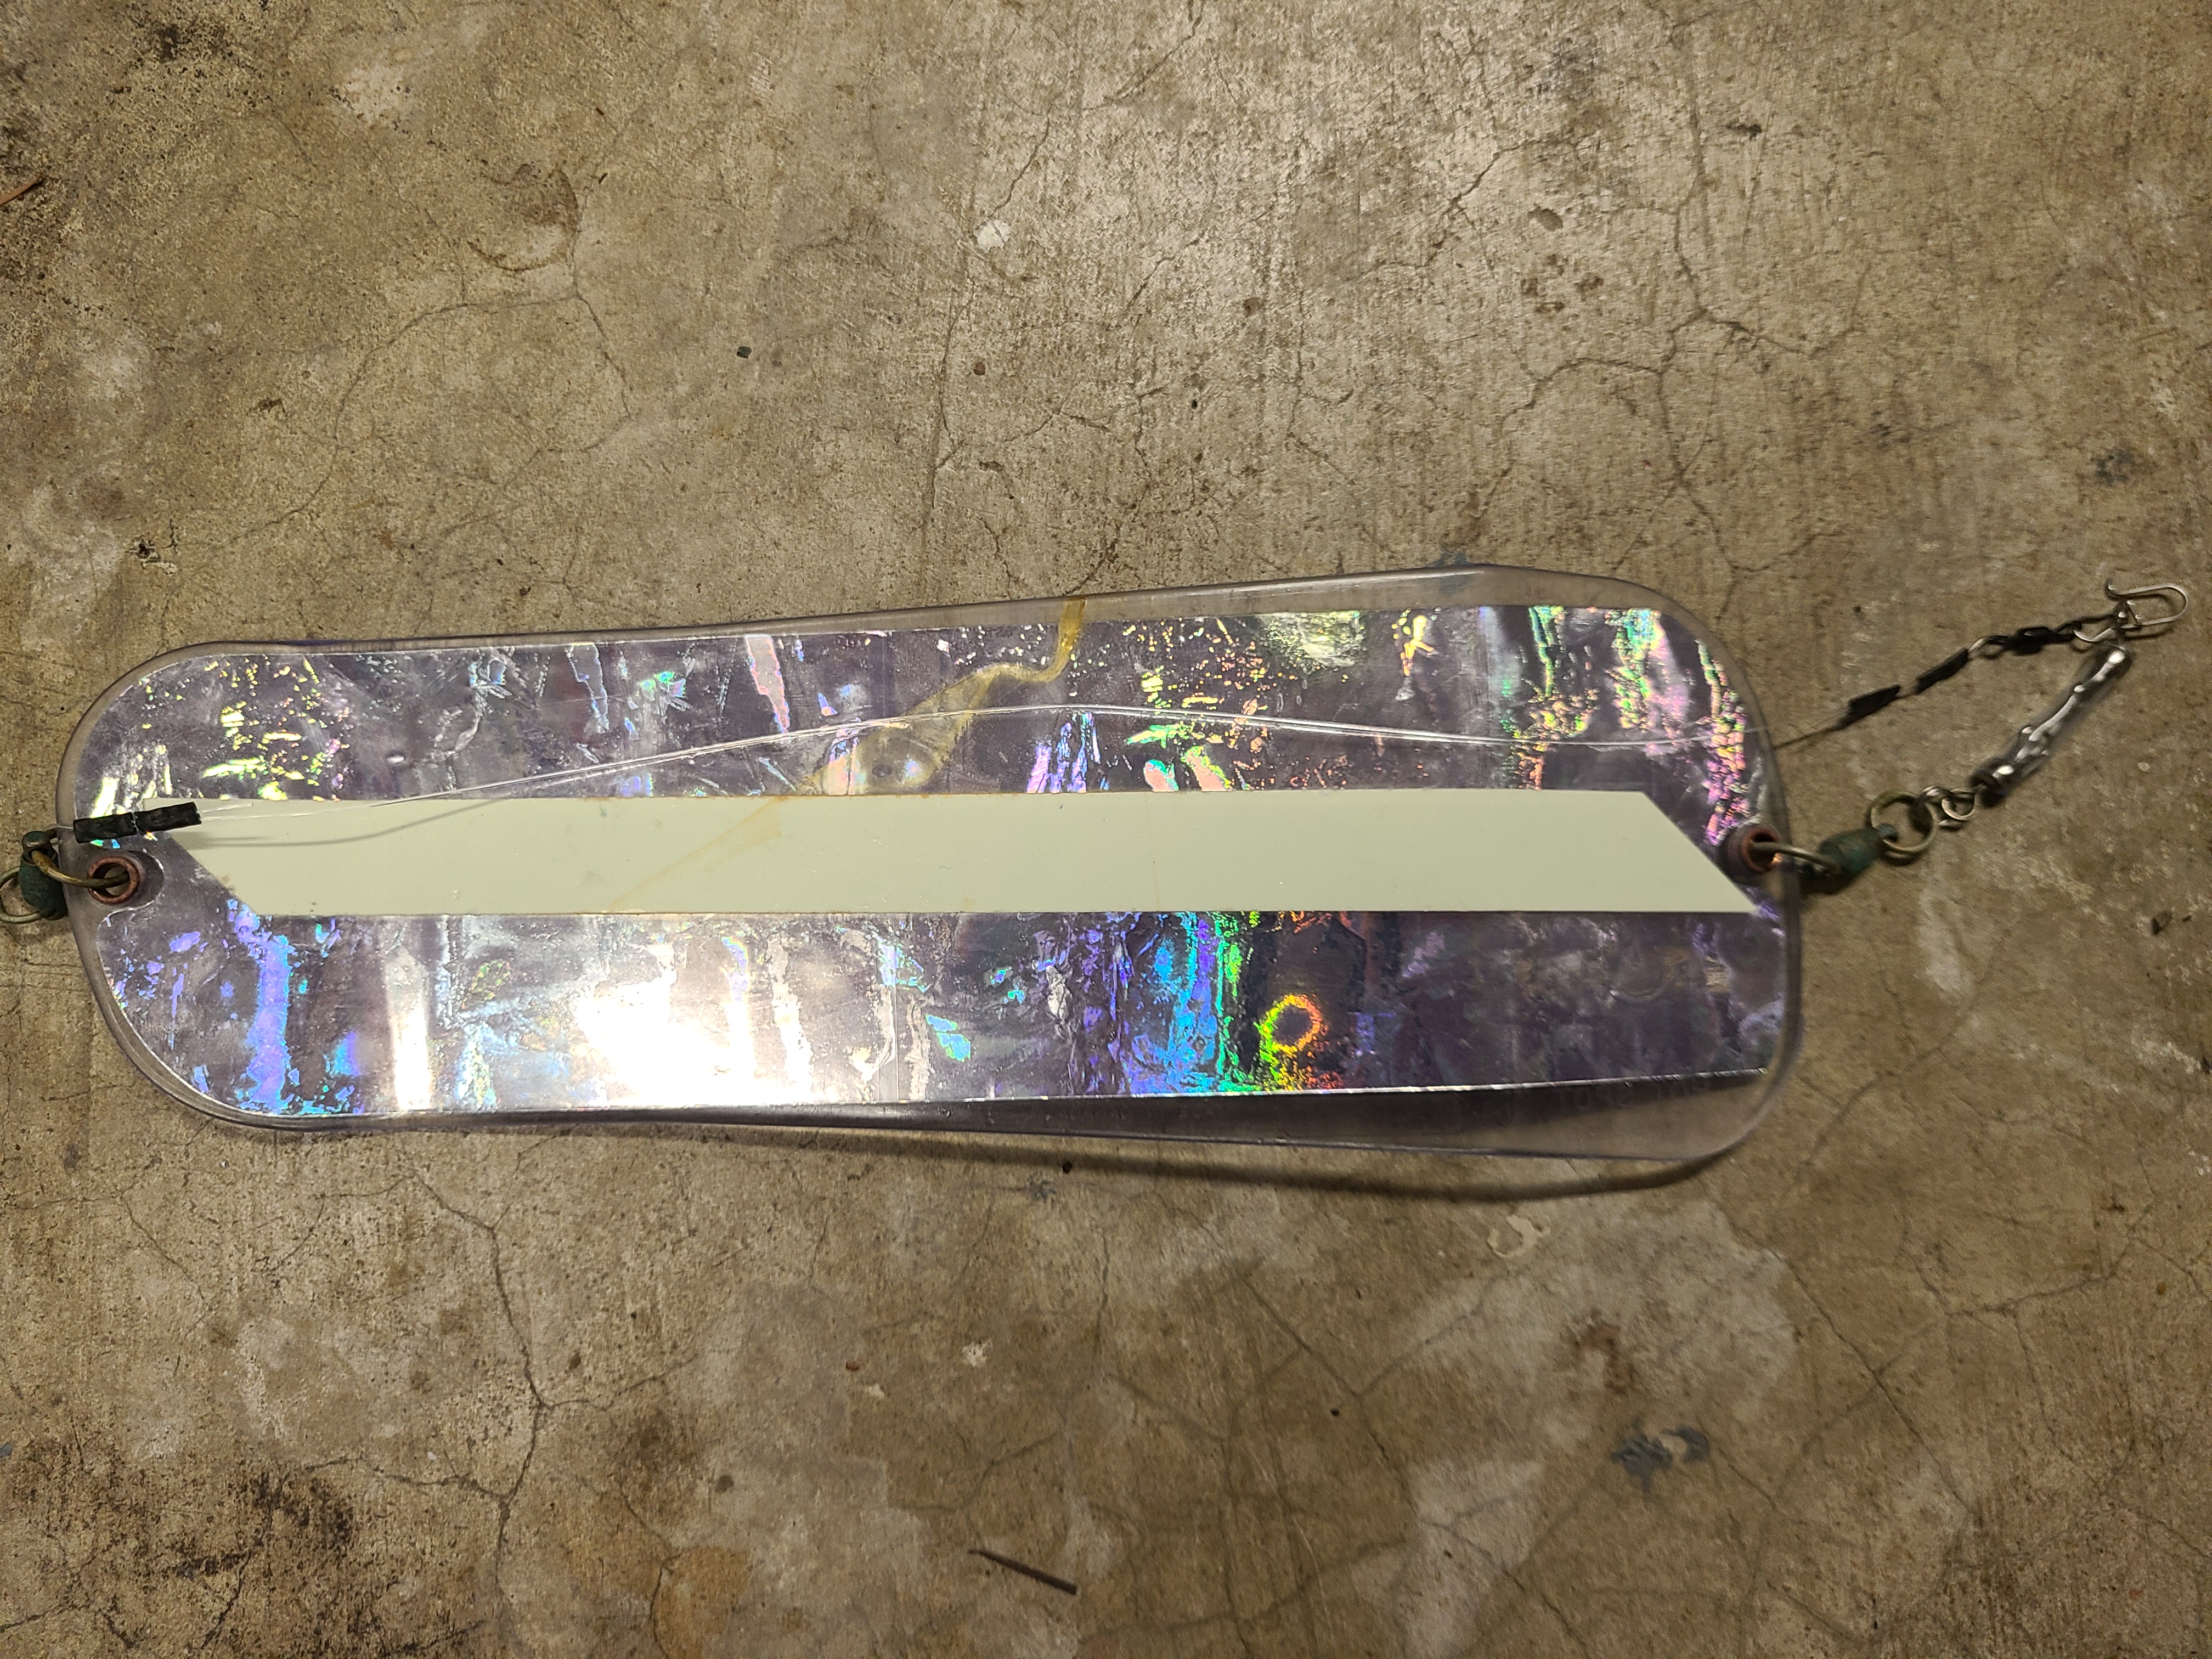
What Randy showed me was a do it yourself modification that turns your flasher into a breakaway flasher. What’s a break-away flasher you ask? Simple, and quite ingenious, when a big fish hits the lure or bait that is behind the flasher, the flasher pops off the terminal lure line and hangs free on your mainline. That in turn means no drag on your main line, and more importantly, no opportunity for the flasher to catch the water and create slack line, losing you a fish. It’s a huge game-changer!
You can buy flashers that are set up out of the bag as break-aways, and you can also buy kits to convert your gear to break-aways. They typically add eight to ten dollars on to the cost of your flasher. Or, you can use the system Randy showed me and convert each of your flashers for around fifty cents per flasher. I’m a big fan of these “do it yourself” projects and like saving money.
It will take you about five minutes per flasher to do the conversion. Here’s the parts you’ll need:
-aquarium air tubing (found at any pet store or second hand stores)
-#3 barrel swivels
-30 to 50 pound mono or steel leader
-crimps
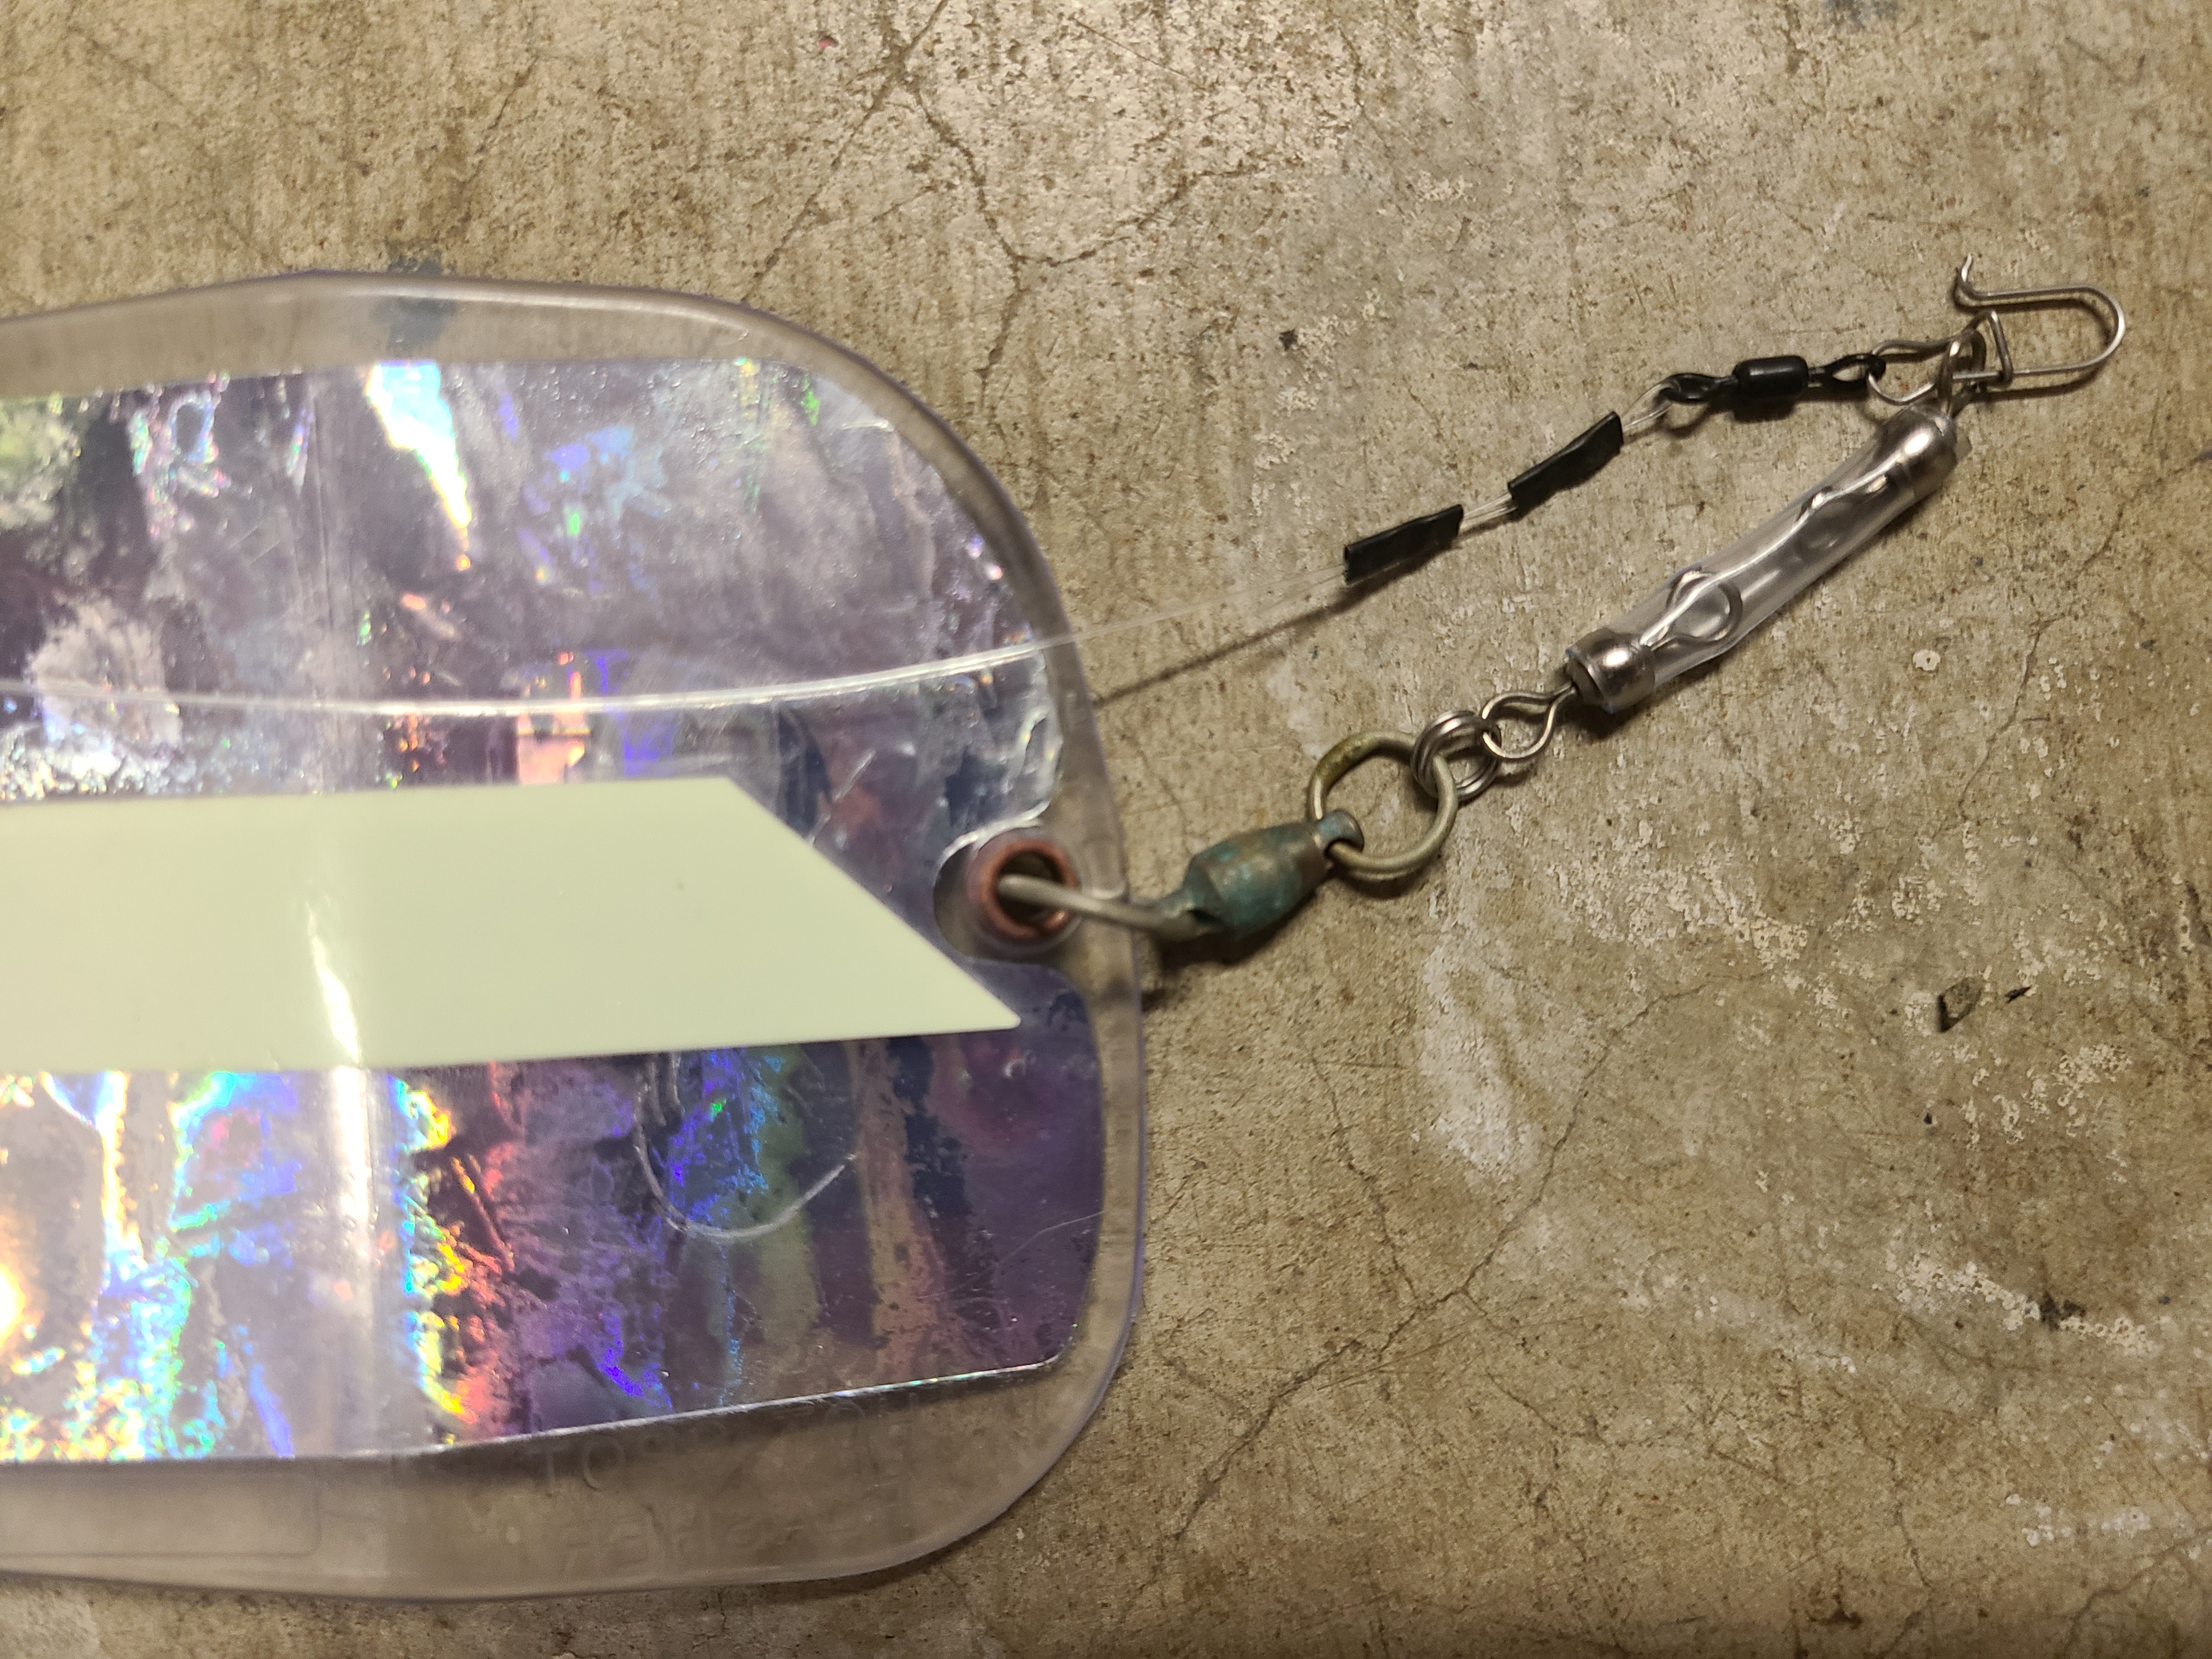
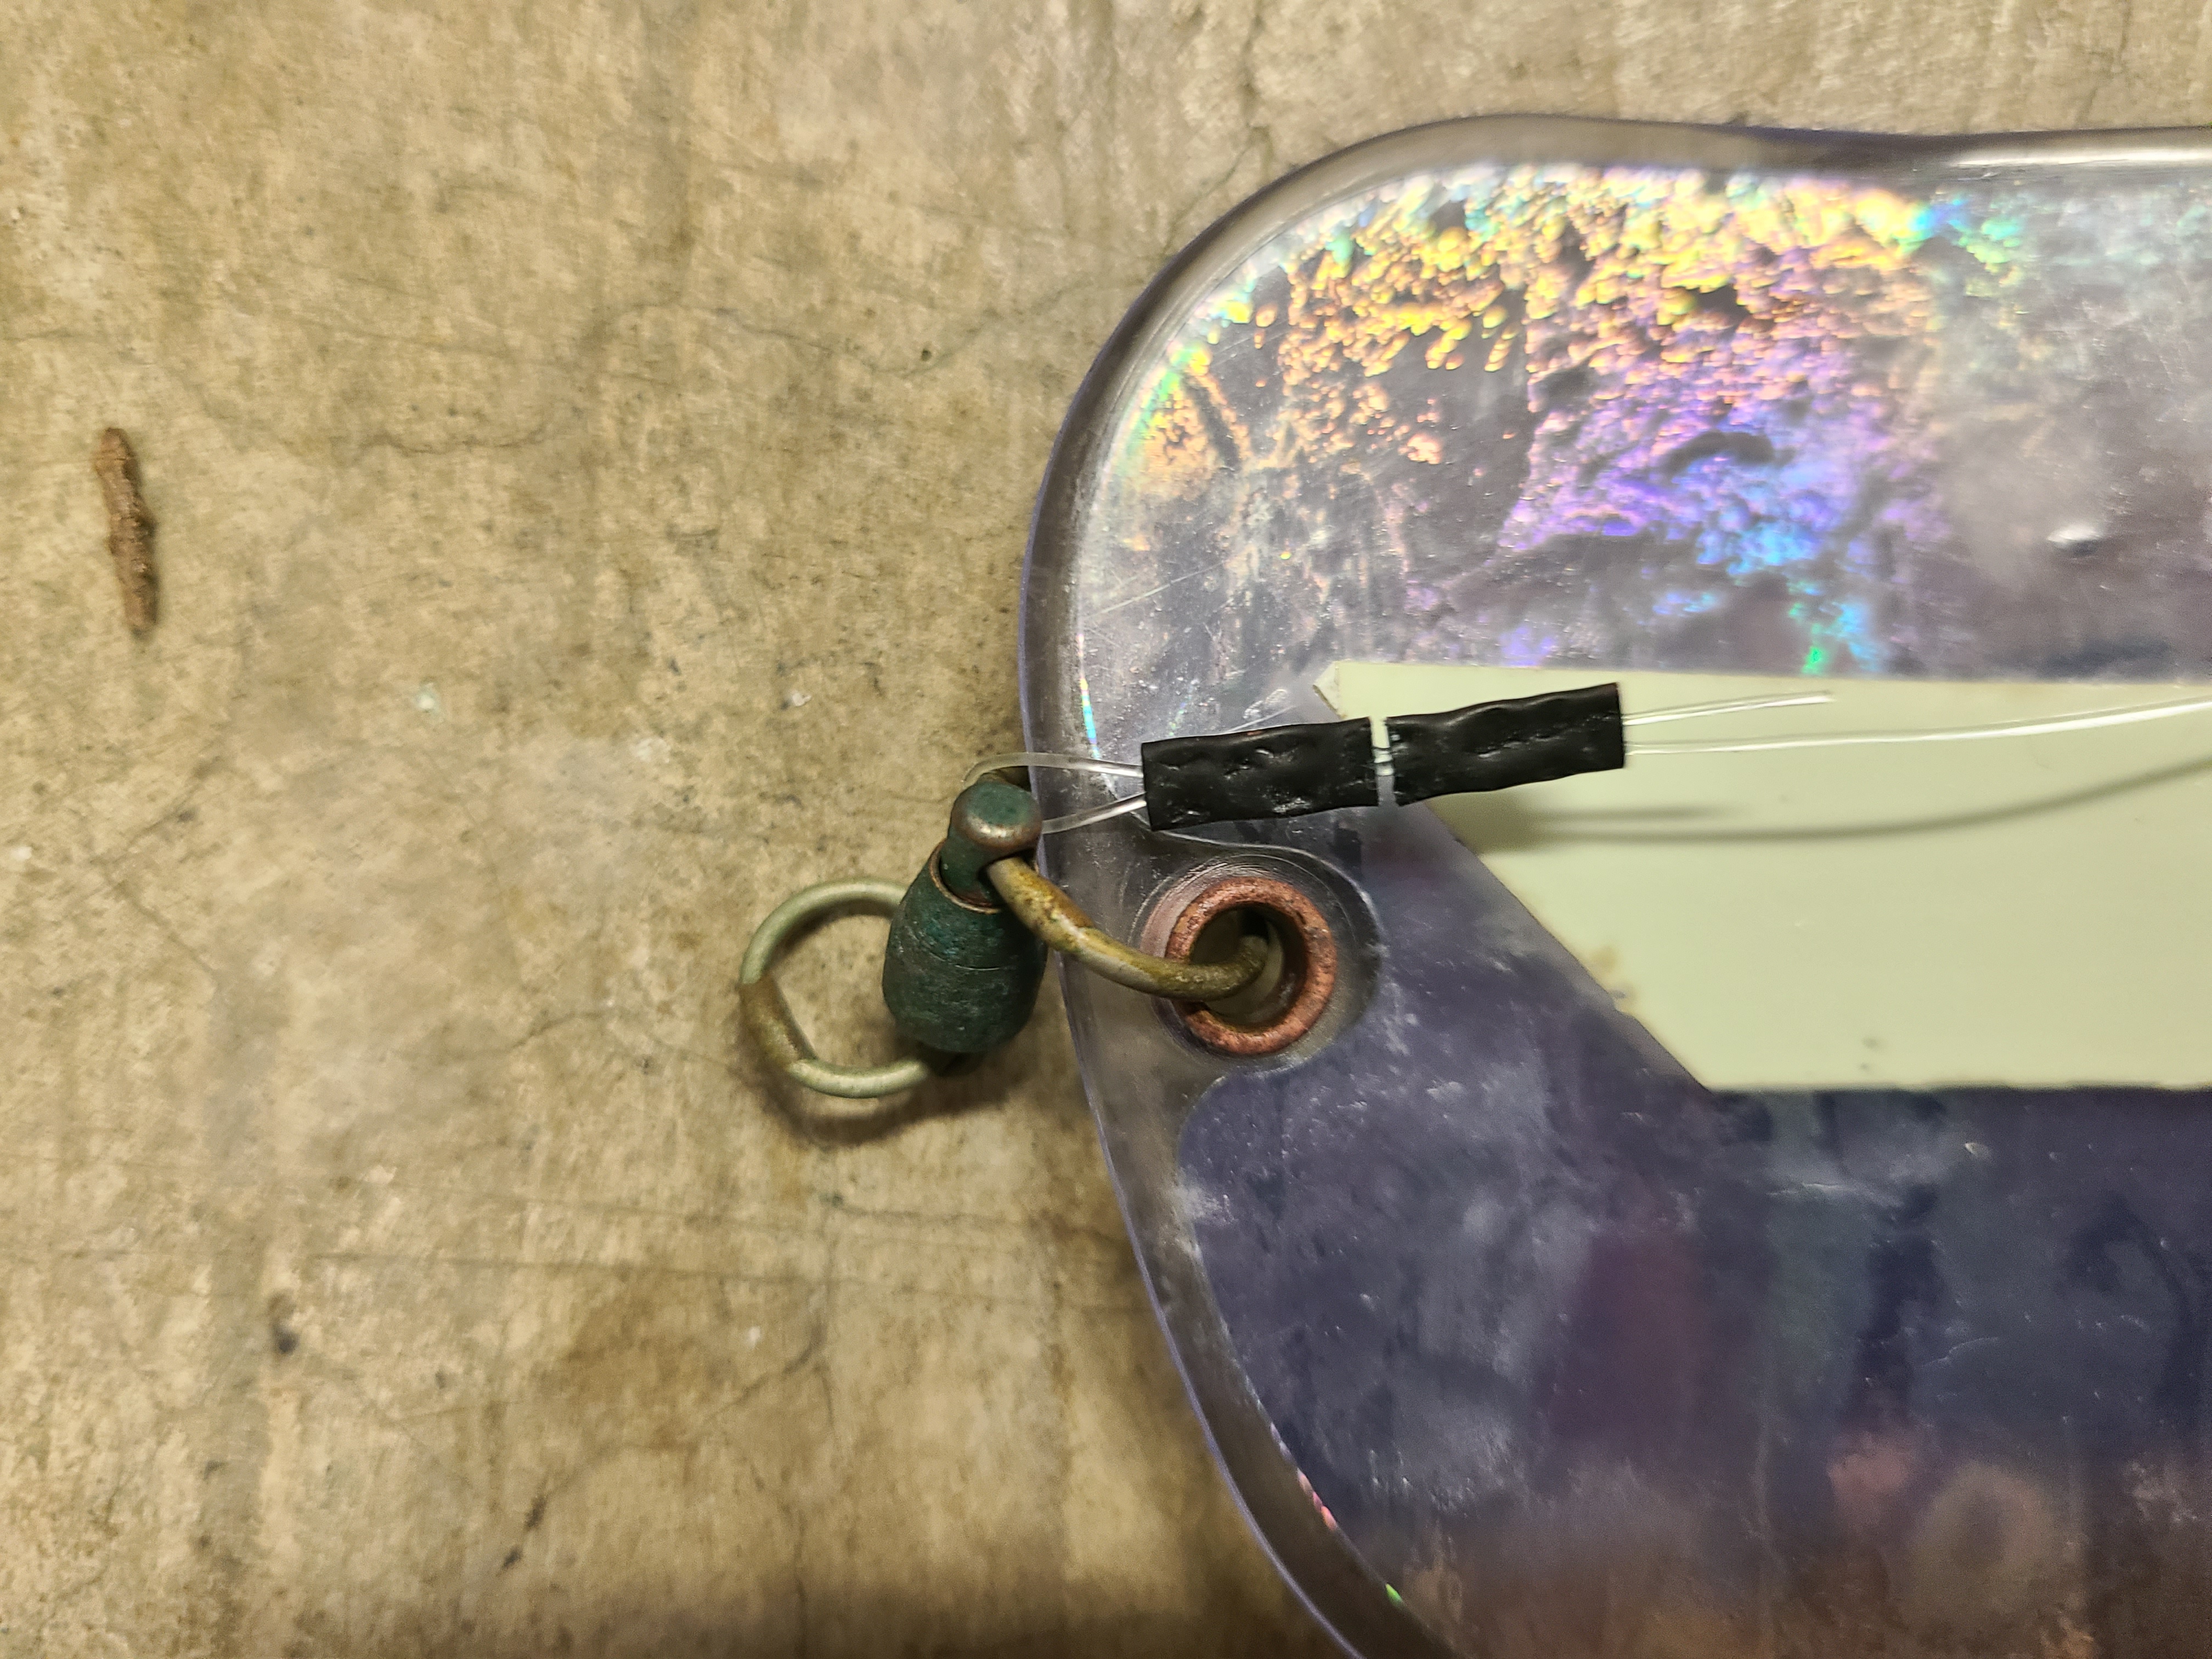
The concept is pretty straightforward. We’re going to make a “bypass” line that extends from the front of the flasher to the back of the flasher. On the back end the bypass line ill connect to a barrel swivel. This barrel swivel in turn is jammed into a 2 inch long piece of air tubing. One the far end of the air tubing is another swivel jammed in as well. That swivel in turn is connected to the far (fat) end of the flasher. When the fish hits your lure, the barrel swivel will pull out of the air tubing, releasing the flasher fat end and letting it swing freely on your line. Meanwhile your line is now connected by the “bypass” 30-50 pound mono from your main line to your lure. When you create this bypass line, you’ll want to make it a little slack so the terminal lure can swing freely behind the flasher. It doesn’t have to be a perfect fit.
You’ll feel every head shake and blazing fast run the fish makes without the interference of the flasher. The difference in fight is amazing!
There are a couple fine points to note (and things that I learned). First, the week point in the set up is the bypass line. Specifically, the crimps that are used to connect the line together can cause a weak point and potentially break your line. I found this out the hard way using twenty five pound line and losing a fish. What I discovered was the line was not strong enough and the crimp was applied too tight, cutting into the line and creating a weak point in the line. The work around is to use heavy mono and be careful not the crush the crimp down too hard. Another option (which I have not tried yet), would be to use steel cable for this bypass segment. I think the steel would be more resistant to the crimp cutting the line. That said, I went back and used fifty pound line on my bypass section and was catching fish with no equipment failures. You may be asking yourself, why don’t you just tie a nut on the bypass line to connect it? I have not tried doing it this way, and I think you could, but you might find it a bit hard getting the line the proper length. The bypass line needs to be not too tight and not too lose. You’ll see what I mean when you make your first setup.
With the coho season coming to an end winter is a great time to go through your gear and update your flashers. As you get the hang of adding this modification to your flashers you’ll see how easy it is to make. And as you fish it you’ll wish you had learned this trick years ago!
Comments
Why is this comment inappropriate?
Delete this comment? Provide reason.